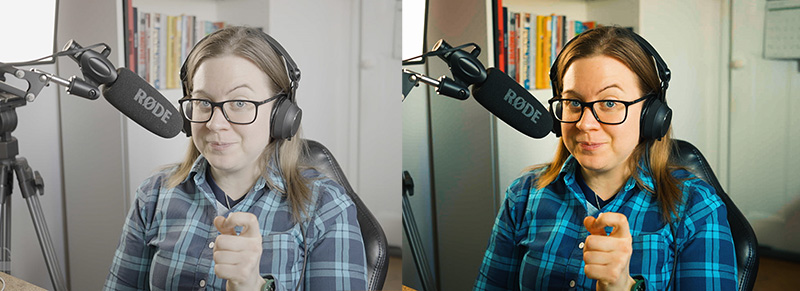
As a videographer, the post-production phase is where your creative vision truly comes to life, especially when it involves color grading. It’s an exciting process for many of us, but let’s be honest, consistency is key, especially when you’re working in a log format. Reapplying the same color grading settings over multiple projects can be a bit of a hassle. That’s where the magic of LUT comes in.
You might already be familiar with saving presets from the Lumetri Color panel. It’s handy, but it places your settings in the effects panel. What if you want to streamline your workflow even further? That’s where exporting and using your own LUT (Look-Up Table) becomes a game-changer. Unlike presets, LUTs go straight into your LUT menu, making them more accessible. But there’s a catch – if you’ve ever clicked ‘Browse’ and uploaded your exported LUT, only to find it missing the next time you open Premiere Pro, you’re not alone. This happens because the LUT isn’t saved in your library.
If you want to become a much faster video editor, I have published a Premiere Pro pdf guide where I uncover hidden features of Premiere Pro, practical tips and tricks for speedy workflow.
Frustrated? I was too, especially on my Mac. But fear not, I’ve cracked the code for both Mac and Windows users, and I’m here to share it with you.
Understanding LUTs and Their Role in Videography
Before jumping into the technicalities of accessing LUTs, let’s take a moment to understand what a LUT is and why it’s such a valuable tool for videographers. A LUT, or Look-Up Table, is essentially a roadmap for color grading. It takes specific color values and outputs them as different colors, based on the LUT’s settings. This process is crucial for videographers, especially when dealing with log format footage, which often looks flat and desaturated straight out of the camera.
Once you exported your color grading as .cube (LUT) from Lumetri Color panel, then you need to import back into Premiere Pro but not directly through Premiere.

What types of LUTS can we use?
LUTs serve two primary functions: correction and creative grading. Correction LUTs are used to bring log format footage back to a more natural, baseline look, making it easier to work with. On the other hand, creative LUTs are used to impart a specific mood or style to the footage. They can emulate film stocks, create vintage looks, or even mimic the color grading of popular films.
For videographers, LUTs are a time-saving miracle. They allow you to apply complex color grades instantly, ensuring consistency across different shots and projects. This consistency is key in professional video production, where maintaining a uniform look and feel is often crucial. Moreover, LUTs can be shared across different software and platforms, making them a versatile tool in your post-production arsenal.
Do you need to use LUT in your workflow?
Incorporating LUTs into your workflow not only enhances the visual appeal of your projects but also streamlines your post-production process, allowing you to focus more on the creative aspects of your work. Now that we understand the significance of LUTs, let’s get back to how you can access and manage them in Adobe Premiere Pro on both Mac and Windows systems.
Accessing Premiere Pro LUTs on Mac:
1. Open Finder and click on ‘Go’ in the menu bar.
2. Hold down the ‘Option’ key to reveal the ‘Library’ option, then click on it.
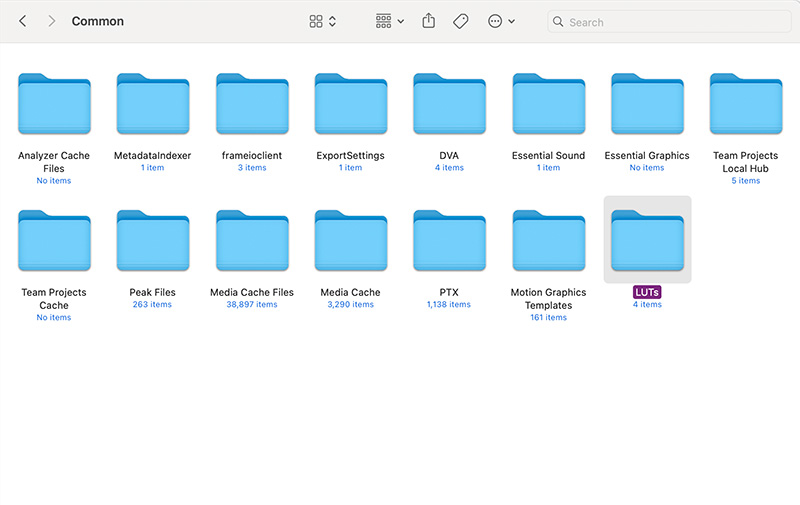
3. Navigate to ‘Application Support’ > ‘Adobe’ > ‘Common’.
4. Here, you’ll find the ‘LUTs’ folder, with two subfolders: ‘Technical’ and ‘Creative’.

Accessing Premiere Pro LUTs on Windows:
1. Open File Explorer and go to your C: drive.
2. Navigate to ‘Program Files’ > ‘Adobe’ > ‘Adobe Premiere Pro’ (your version number).
3. Find the ‘Lumetri’ folder and open it.
4. Inside, you’ll see the ‘LUTs’ folder, again with ‘Technical’ and ‘Creative’ subfolders.
By placing your custom LUTs in these folders, they become a permanent part of your Premiere Pro library. This means no more disappearing acts for your carefully crafted LUTs. You can now apply them with ease in any future project, ensuring a consistent, professional look with minimal effort.
Remember, while this might seem like a small step in your video editing process, it’s these little efficiencies that add up, saving you time and frustration in the long run. Happy color grading!
Stop wasting hours on things that should take minutes. My Premiere Pro PDF guide is packed with practical hacks that will instantly speed up your workflow and make editing fun again.


Comments are closed