
If you’re color grading every clip from scratch… you’re wasting a lot of time. Once you find a look you like in Premiere Pro, you should never rebuild it again. You can save Lumetri color preset and reuse it instantly on any project.
Here’s how to do it properly.
Why saving presets matters (most people ignore this)
Color grading is one of the most time-consuming parts of editing.
But here’s the thing:
Most of your projects use a similar look.
- same lighting style
- same camera
- same vibe
So instead of repeating the process every time…
you build a preset once and reuse it.
That’s how fast editors work.
Step 1: Open Your Project
First things first, open up the Premiere Pro project where you’ve done your color grading.
Step 2: Locate the Lumetri Color Panel
Navigate to the “Window” menu at the top and select “Lumetri Color” to open the panel. If you’ve already been working on color grading, chances are this panel is already open.
Step 3: Make Your Adjustments
Go ahead and make all the color adjustments you want. You can mess around with exposure, contrast, highlights, and so on. Get that look just how you like it.
Step 4: Save Lumetri color preset
Once you’re happy with your color grading, look for the three horizontal lines (often called a “hamburger menu“) at the top right corner of the Lumetri Color panel. Click on it and select “Save Preset.” If you want to send this preset to other computer/laptop, you can save is as .cube which is LUT (good for integration with cameras and monitors as well) or .look which is going to be displayed in your Creative tab of Lumetri color panel once you Browse and import.
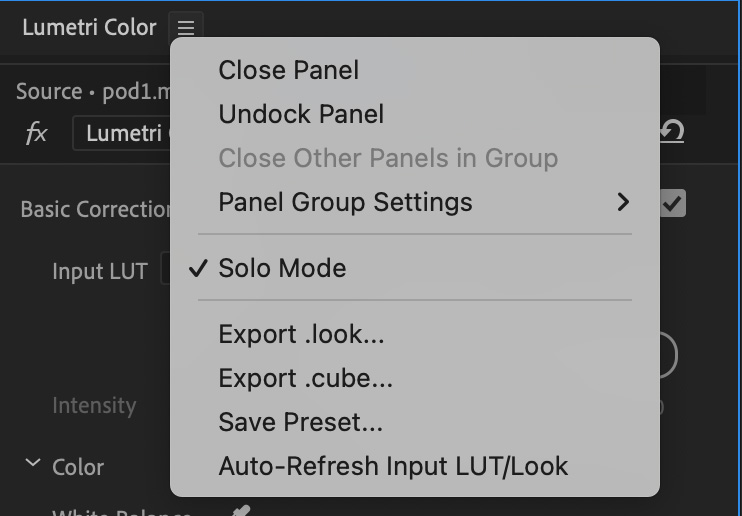
Step 5: Name Your Preset
A dialog box will pop up asking you to name your preset. Give it a name that you’ll remember. You can also add a description if you want to be extra organized.
Step 6: Choose the Type of Preset
You’ll have an option to save Lumetri color preset as either a “Lumetri Color” preset or a “Lumetri Look.” The main difference is that a “Look” includes a LUT (Look-Up Table) if you’ve used one. Choose the one that fits your needs.
Step 7: Confirm and Save
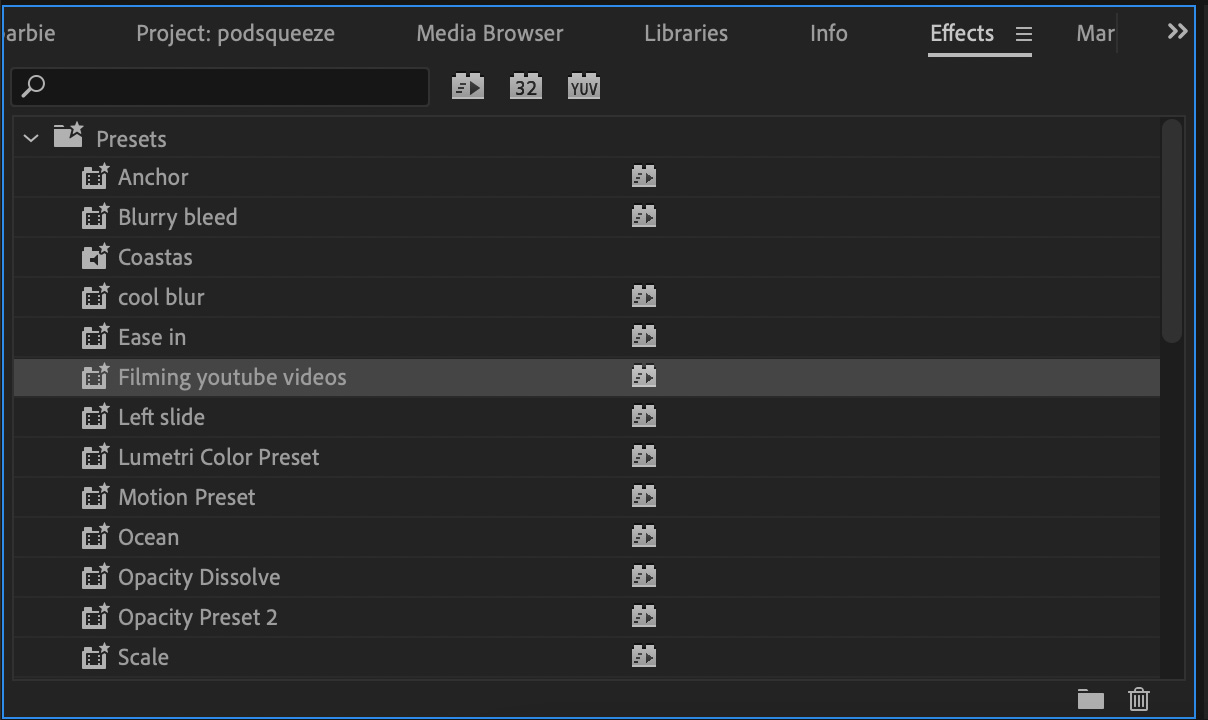
Hit “OK” to save your preset. You’ll find it later under the “Effects” panel under presets. You can also export it by right-clicking on it.
Preset vs LUT (important difference)
This is where people get confused.
- Preset → saves your exact Lumetri settings inside Premiere
- LUT (.cube) → can be used across different software and cameras
If you want to use your look outside Premiere, export it as a LUT.
Watch the full walkthrough
For more tutorials, subscribe to my Youtube channel.
Want to Edit Faster in Premiere Pro?
If you’re still doing things manually in Premiere, you’re wasting time without even realising it.
I put together a free Premiere Pro hacks guide with the shortcuts and small workflow tricks that actually make editing faster (not the obvious stuff you already know).
It’s the kind of things that save you minutes on every project… which adds up fast.
Final thought
Saving presets is one of those small things… but it completely changes how fast you edit.
Once you start doing this, you stop repeating work and your videos stay consistent without extra effort.


Comments are closed