
If your captions in Premiere Pro look wrong and you’ve got 50+ subtitles sitting in your timeline…
yeah, you’re not fixing them one by one.
That’s the slowest way possible.
There’s a much faster way to change the font (and styling) for all captions at once, and once you use it, you’ll never go back.
Why this is so frustrating in Premiere Pro
Premiere doesn’t make this obvious.
Most people:
- edit one caption
- copy settings manually
- or worse… redo everything
And that’s exactly why it feels slow.
But the reality is:
Premiere already has a built-in way to update everything instantly.
Step 1: Open Your Project in Premiere Pro
First things first, let’s get your project open in Premiere Pro. If you’re new to this, just click on the Premiere Pro icon on your desktop, and once it’s open, select ‘Open Project’ to choose your file.
Step 2: Locate Your Caption Track
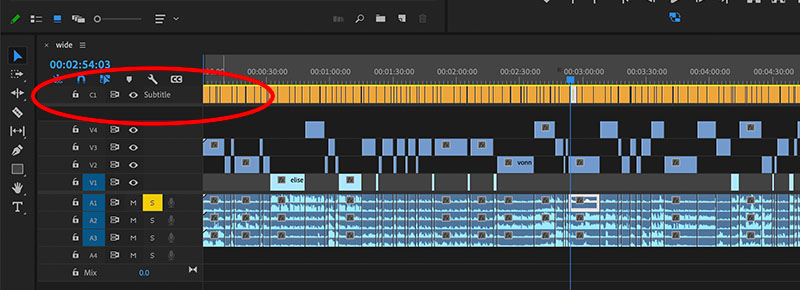
Got your project open? Great! Now, find the sequence that has the caption track you want to edit. The caption track is usually located in the timeline on top spot, labeled as ‘C1 Subtitle’.
Step 3: Open the Essential graphics panel
Here’s where the fun begins. Go to the ‘Window’ menu at the top of the screen and select ‘Essential graphics’. This will open the Essential graphics panel.
Step 4: Select Your Captions
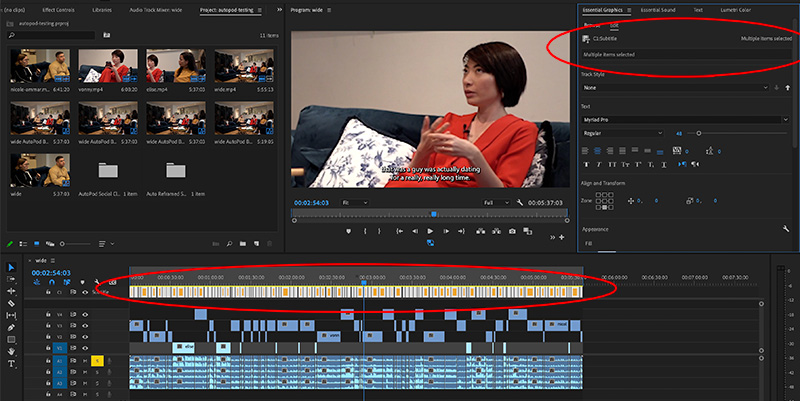
Go back to the timeline and highlight all the captions in your caption track. You can create a selection or you can use Track select forward tool [shortcut A], hold down the shift key and click at the beginning of caption track 1. This will highlight every single track. Make sure you’re not highlighting video and audio clips otherwise this technique will not work.
Step 5: Change the Font
Navigate back to Essential graphics panel and change the font, size, colour, and position to your liking. With your captions selected, they will all change. Remember, the font you choose can really set the mood for your video, so choose wisely!
Method 2 (Newer versions): Properties panel
If you’re using newer Premiere versions (2024+), Adobe started moving things around.
Instead of Essential Graphics:
- Select all captions
- Open Properties panel
- Change font there
Same result, different panel.
Common mistake (this is why it “doesn’t work”)
If nothing changes, it’s almost always because:
- you selected video + captions together
- or only one caption is selected
Premiere is weird about this.
You need a clean selection of captions only.
Why this matters (especially for content creators)
Captions aren’t just decoration anymore.
They:
- increase watch time
- make videos usable without sound
- improve engagement
In fact, a huge percentage of videos are watched without sound, which makes captions essential for performance
So having consistent, clean captions is not optional anymore.
Want faster editing in Premiere Pro?
If you edit a lot, small things like this save hours over time.
I put together a PDF with the exact shortcuts, tricks and workflows I personally use to speed up editing.
Final thought
This is one of those things Premiere hides for no reason.
Once you know it, you stop wasting time… and your videos instantly look more consistent.
Comments are closed