If you’ve ever scrolled through Instagram and wondered how to Take Professional Product Photos to get those rich, moody, professional-looking shots using nothing but their phones, you’re in for a treat. This simple phone photography trick transforms ordinary snapshots into eye-catching images — perfect for product photography, social media content, or just leveling up your creative game.
The best part? You don’t need fancy gear, paid apps, or even editing software. All it takes is your phone, a source of light, and a small change in how you use your camera’s exposure settings.
Let’s walk through the concept first. Normally, your phone is set to auto exposure, meaning it tries to balance the light in your scene for a clear, bright image. But for dramatic or cinematic shots, this actually works against you. The trick is to manually lower your exposure. Think of it like setting the mood — the darker you go, the more intentional the light becomes. There’s one simple rule here: you can go down, but not up. This means you should lower the exposure to darken the scene, but avoid increasing it, which ruins the vibe.
Before you shoot, make sure manual exposure is enabled on your phone. This can often be done directly from your camera app by tapping the exposure icon and dragging the slider, but if you don’t see it, head into your camera settings and enable all the manual options.
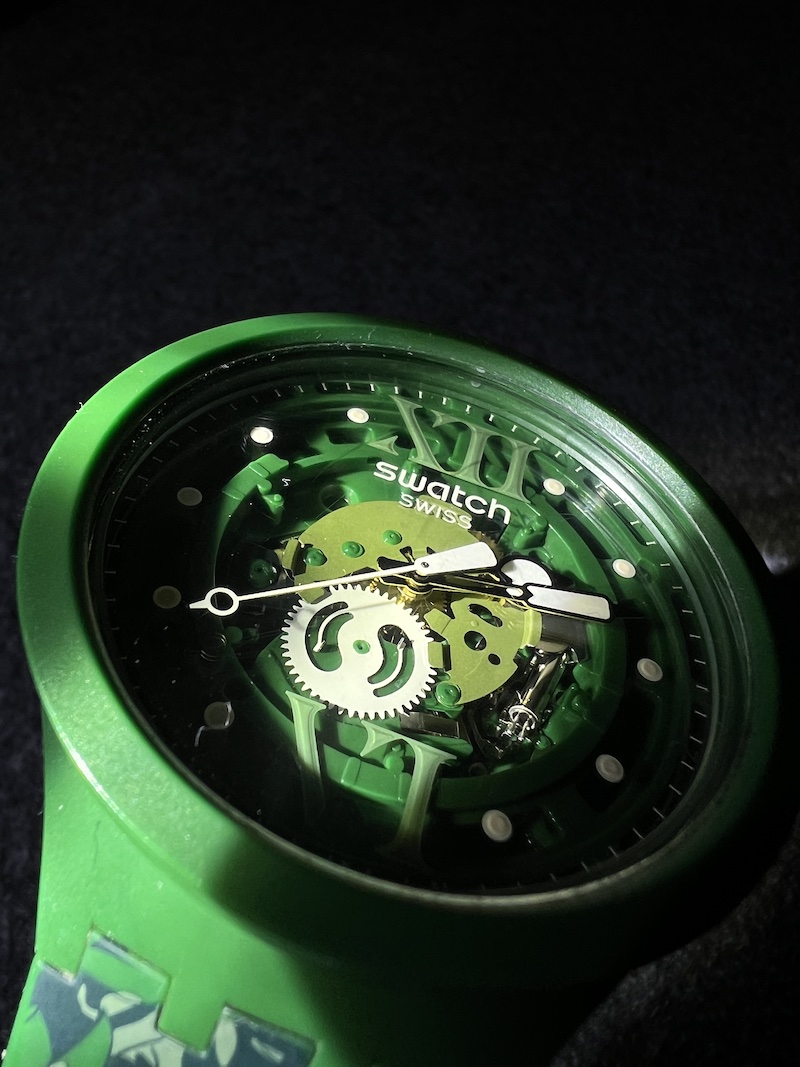
Once that’s done, it’s time to set the scene. Ideally, you’ll want a product that doesn’t reflect too much light — think of something like a watch or matte-finished object. Choose a space with minimal ambient light: close the blinds, dim the room, and create a clean backdrop. The darker the environment, the more control you’ll have over where the light lands.
Now here’s where the magic happens. Set your phone’s exposure all the way down (typically to -2). With the room dark, switch on a flashlight or a desk lamp and direct it at your subject. You’re not just illuminating the object — you’re sculpting with light. Move the light around. Try different angles. Get closer with the camera. Shift the direction of the beam. What you’re doing is searching for those cinematic shadows and highlights that add depth and character to your shot.

To help you visualize the transformation, here’s a quick breakdown:
What You’ll Need:
-
A phone with manual exposure settings.
-
A small light source (flashlight, lamp, etc.).
-
A dark space.
-
A non-glossy object to photograph.
Steps at a Glance:
-
Enable manual exposure on your phone.
-
Lower the exposure to its minimum setting.
-
Create a dark environment.
-
Use your light source to shape and highlight the subject.
-
Adjust angles and distance until you get that perfect, moody shot.
The difference is dramatic. A photo taken with automatic exposure looks flat — too bright, too even, and full of distractions. But once you reduce exposure and add selective lighting, the result is striking: deep contrast, rich tones, and a truly professional feel.
So next time you want to make your phone photos stand out, remember — it’s not just about the gear, it’s about knowing how to control the light. Try it out, experiment, and most importantly, have fun creating!
And if you want to learn how to film professionally looking video with your phone, you read this blog.
Want me to review your videos and tell you exactly what’s holding them back? I’ll analyse your content and give you a clear plan to improve your filming, editing, audio and storytelling. Get your content reviewed here.


Comments are closed