

Achieving a cinematic film look isn’t about expensive cinema cameras—it’s about intentional lighting, depth composition, and creative control. You can shoot cinematic footage on an iPhone or an entry-level mirrorless camera by avoiding harsh midday sun, using prime lenses with wide apertures (f/1.8–f/2.8), shooting in a Log profile (like S-Log3), framing shots with 3-layer depth (Foreground, Midground, Background), and prioritizing manual focus for storytelling intent.
In this blog, I’ll explain each of those and more in more depth.
The $10,000 Gear Myth
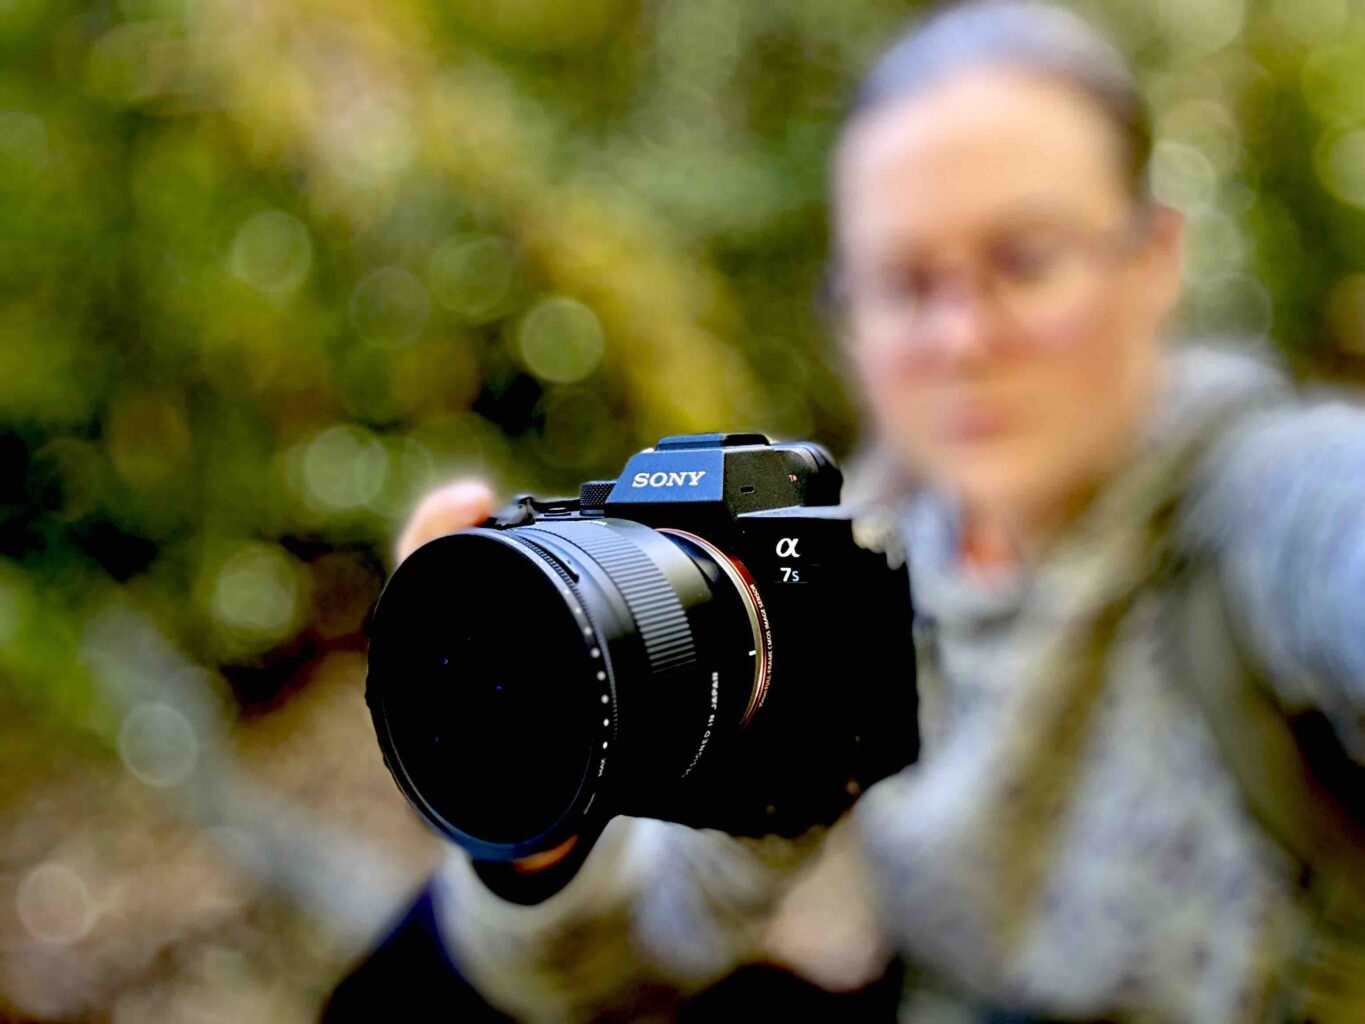
You don’t need to spend $10,000 on a RED or ARRI cinema camera to create high-end, Hollywood-style visuals. While expensive gear is nice to have, cinematic storytelling comes down to small, deliberate choices in production and lighting, not the size of your camera body. By applying film-making principles, you can film on your phone. However, as a professional videographer, I’m going to use my main gear which is Sony Alpha 7S III with Tamron 35 mm lens, aperture 2.8.
1. The Equipment Setup: Camera Bodies & Lens Selection
If you are buying your first camera setup, avoid kit lenses at all costs.
-
The Kit Lens Trap: Most camera bundles include a zoom lens with a variable aperture starting at f/3.5 or f/5.6. These lenses restrict your low-light performance and make it extremely difficult to isolate your subject with a shallow depth of field.
-
The Prime Lenses Strategy: Buy a camera body only, then pair it with a fast 35 mm or 50 mm prime lens offering an aperture of f/1.8 or f/2.8.
Also, make sure to buy a camera that can shoot in Log to get the best dynamic range you can for the color grading process. I shoot in S-Log3 (Cine) in 4K 10-bit 4:2:2 at 50fps / 100fps to preserve maximum dynamic range. Shooting in Log is non-negotiable—it’s the video equivalent of RAW photography.
2. Outdoor Shooting: Master the Light and Time of Day
The fastest way to spot an amateur videographer is when they schedule a shoot under a bright, midday sun.
Avoid the 11:00 AM – 3:00 PM Sun Trap
Direct midday sunlight creates harsh, unflattering facial shadows and blown-out highlights. Unless you are specifically shooting for a high-contrast black-and-white look, avoid shooting between 11:00 AM and 3:00 PM.
How to Master Outdoor Lighting:
-
Shoot During Golden Hours: Schedule your shoots around sunrise, sunset, or early morning/late afternoon when the sun is low and soft. Of course, on a gloomy day it doesn’t matter.
-
Use ND Filters: If you must shoot in direct sunlight, attach a Variable ND (Neutral Density) filter to maintain a proper shutter speed without stopping down your aperture.
-
Seek Open Shade: Position your talent under tree canopies, building overhangs, or shadowed alleys to diffuse harsh sunlight.
3. Wardrobe & Production Design: Color Palette Intent
Cinematic visuals begin in pre-production. What your talent wears directly influences your final color grade.
-
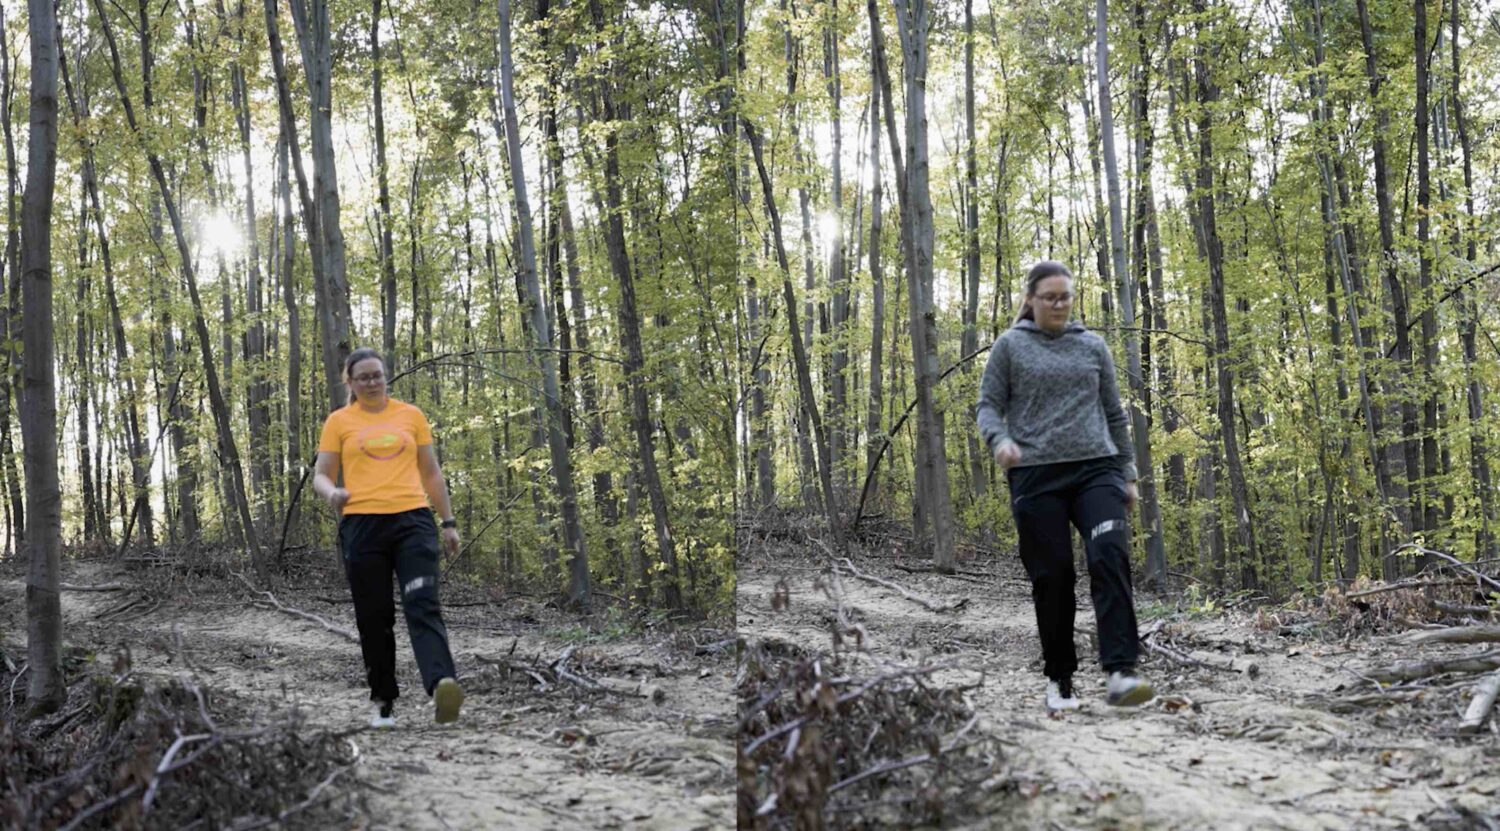
Avoid Color Clashes: A neon jacket in a lush green forest pulls immediate focus to a wardrobe mistake.
-
Complementary Palettes: Choose wardrobe colors that naturally harmonize with the environment—such as earth tones, olives, charcoals, and deep browns for natural settings.
Every scene should be color-planned before you roll camera. Color grading can enhance a mood, but it cannot fix poor production design.
Screenshot
4. Framing & Composition: Creating 3-D Depth on a 2-D Screen
Film is dimensional; flat video is boring. To make your shots feel cinematic, structure your compositions into three distinct layers:
[ LENS ] ==> 1. FOREGROUND (Blurred Object) ==> 2. MIDGROUND (Subject) ==> 3. BACKGROUND (Environment)
-
Foreground: Place an out-of-focus element near the lens (a doorway, a tree branch, or the edge of a desk) to frame the shot.
-
Midground: Position your main subject or primary action here.
-
Background: Keep ample distance between your subject and the back wall or horizon to create separation.

Advanced Framing Techniques:
-
Spy Cam/Obstructed Views: Shoot past foreground objects to give the viewer an intimate, “fly-on-the-wall” perspective.
-
Break Eye-Level: Avoid framing every shot at neutral eye level. Shoot from lower angles to give subjects authority or high angles to convey vulnerability.
-
Extreme Close-Ups & Shot Coverage: Capture wide establishing shots, medium character shots, and tight close-ups to give your editor maximum flexibility.
5. Camera Movement: Intentional Motion
Static tripod shots can feel static and lifeless. Adding subtle camera motion—whether handheld or on a gimbal—breathes energy into the frame.
-
Handheld Texture: Even wide establishing shots benefit from slight handheld motion to feel organic and human.
-
In-Frame Motion: Ensure there is movement within the frame (wind moving hair, passing cars, or talent movement) if the camera stays static.
6. Storytelling, Weather, and Atmosphere
Technical mastery without narrative intent is just camera testing. Your location, weather, and mood must match the story you are telling.
-
Atmospheric Moods: A foggy, gloomy forest naturally evokes mystery, drama, or thrillers.
-
The Emotional Mismatch: Shooting a depressing character arc in a sunlit, colorful autumn park creates a visual disconnect. Match your environment and color grade to your character’s internal state.

7. Manual Focus vs. Autofocus
While modern mirrorless autofocus is exceptional for convenience, manual focus is a storytelling tool for intent.
-
Rack Focus: Shifting focus manually between foreground and background guides the audience’s eye precisely when you want them to look.
-
Emotional Drift: Allowing a subject to drift slightly soft can convey confusion, exhaustion, or emotional disconnect—a choice an autofocus algorithm will instantly try to “correct.”
8. Indoor Lighting: Turning Flat Rooms into Film Sets
Shooting indoors doesn’t mean sitting someone in front of a flat white wall with overhead office lights.
Indoor Cinematic Rules:
-
Use Practical Lights: Turn on lamps, desk lights, or ambient fixtures inside the room to build natural key and accent lights.
-
Embrace Shadows: Contrast creates mood. Allow one side of your subject’s face to fall into shadow (ratio lighting) rather than flooding the room with flat light.
-
Create Distance: Pull your subject away from the back wall to prevent harsh shadows and maintain background blur.
🎬 Ready to Elevate Your Brand’s Video Authority?
Comments are closed